


<li id="jsArticleStep1">1
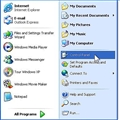
Open the Control Panel on your computer and click on Folder Options. Find the View tab and a few options down you will notice the option Show Hidden Files. Make sure this is clicked. Click on Apply and then click OK.
<li id="jsArticleStep2"> 2
Plug in original ipod (ipodA)and wait until your computer recognizes it. If iTunes doesn't open automatically open iTunes at the same time. You should see the device labeled in the left side of the Itunes Window. Once you see it, plug in the second iPod (iPodB) onto which you are going to be transferring the music.
<li id="jsArticleStep3"> 3
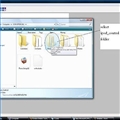
Go to My Computer and you should see both ipods labeled as drives (e.g. E, F, G are common drive labels). Make sure you select iPodA and double click to open the drive. Once opened you sill see a number of files (If you did not do the control panel step this will not work so make sure you followed step one). Click on the folder named "Ipod Control".
<li id="jsArticleStep4"> 4
Inside you will see folders lables F00, F01, F02, etc. Starting with the first, open and drag contained files to the Itunes library Music. You will notice that none of the music has the right names. Instead they are all labled by four letters. This is fine it will fix itself. Once the music is added DO NOT unplug either of the ipods. You can check to see if the music plays regularly just like you always do when playing music in iTunes.
<li id="jsArticleStep5"> 5
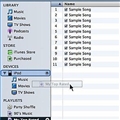
Once you have imported the music into iTunes and have checked to see that it does play and you have added any album artwork that you wanted, you are ready to put it all onto iPodB. Select All in the music tab in iTunes and drag everything to so the mouse cursor drags it all over to iPodB until you see the plus sign to let you know you can drop the files in.
<li id="jsArticleStep6"> 6
Look to the top of the iTunes screen and you should notice that it will say iPod is syncing. You should also see circling arrows next to the ipod onto which you just transferred your media. Once iTunes if finished syncing you are ready for the last step.
<li id="jsArticleStep7"> 7
You are ready to eject the two iPods. Start by ejecting iPodB. Wait intil your computer says something like "It is Now Safe to Disconnect Your iPod". Next do the same for iPodB. Congratulations!! You just beat the system.

 Reply With Quote
Bookmarks